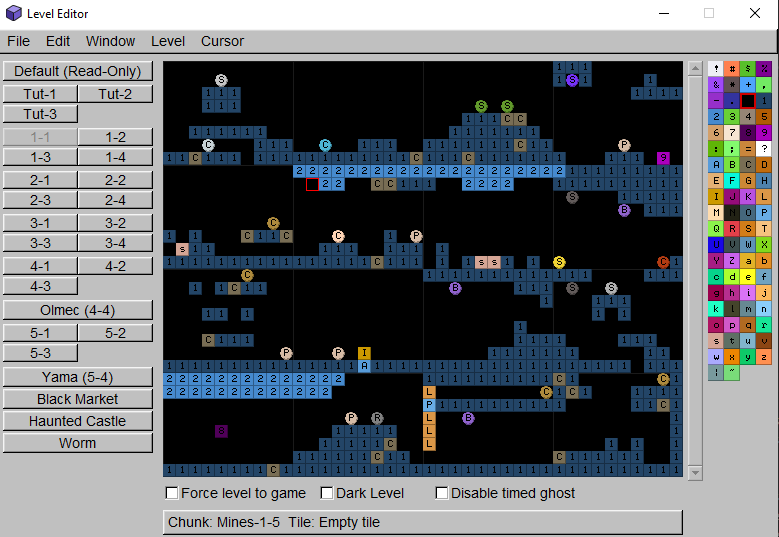
When you first open the editor, you'll see something like the above. The window might be a bit small, so go to Window->Window Size... and set the size you want.
If you go across all the tabs, you'll see there are already "pre-made levels". These levels are just example levels designed to serve as references when designing levels for various areas. If you want to start making a level from scratch, go to Level->Clear Level or press Ctrl+N. You can also get fancy and press Ctrl+A (to make the cursor select the entire level), and Delete.
![]()
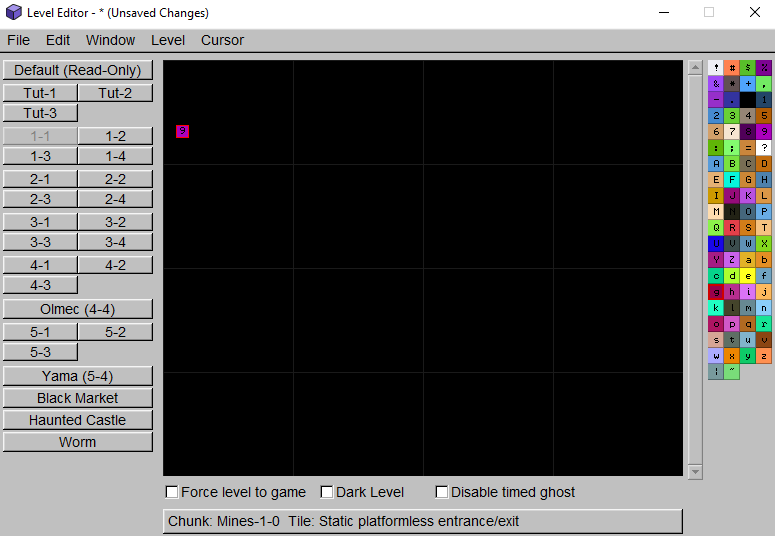
So you've cleared the level, now you've got a blank editor and a grey grid. The grey grid represents invidivual chunks. Certain tiles, such as Altar ('A'), or Vines ('V'), may be chunk-dependent, so they should have plenty of space in their own chunk. For the most part, however, where you place tiles is irrelevant.
Anyways, let's put down an entrance tile. The entrance tile will specify where the Spelunker starts the level. This tile is the '9' tile. The catch, however, is the exit tile is also the '9' tile. So how does the game know where the entrance and exit are? Simply put, all '9' tiles placed in the first four chunks (first row of grey squares at the top of the tile editor) are entrance tiles, and any '9' tiles in the remaining three rows of chunks are considered exits.
In the tile picker, pick the '9' tile by left clicking, then right click in the tile editor to put down the tile. Alternatively, you can left click in the tile editor to position the cursor, then type '9' on the keyboard.
Now, let's put down some '1' tiles, which are regular terrain tiles, underneath the entrance, in some creative fashion. Then put an exit somewhere, ensuring that the exit tile is below the first row of chunks.
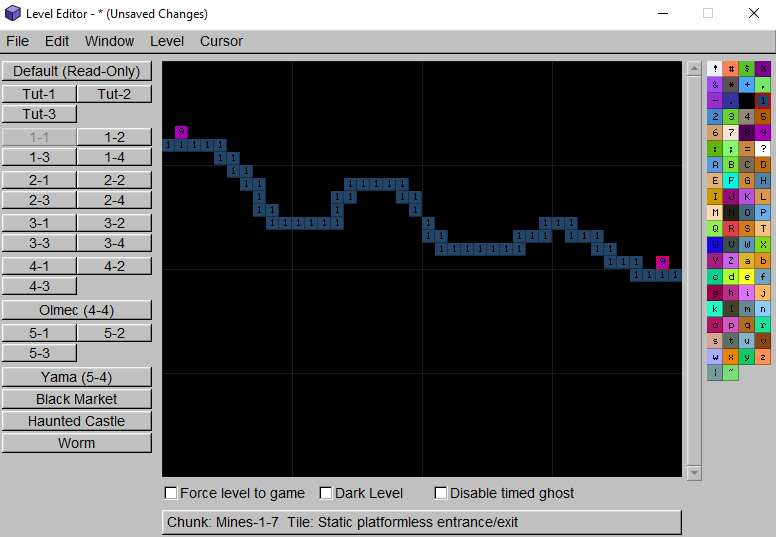
Now we've got some terrain and an exit, but the bottom part of the level is completely empty! Let's take advantage of the flood fill tool by positioning the cursor underneath the line of '1' tiles, then going to Cursor->Flood Fill or pressing Ctrl+F.

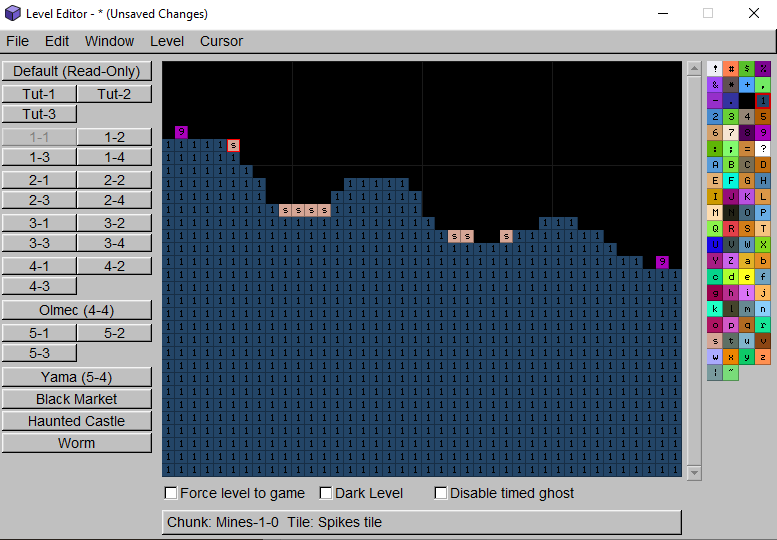
Now let's make the level a bit more dangerous by putting down Spikes ('s' tiles) into the pits.
That looks like enough to test out, so let's see what our level looks like in Spelunky by starting a run as normal. You do not have to restart Spelunky to test your levels: either enter levels through the Lobby or do Quick Restart.
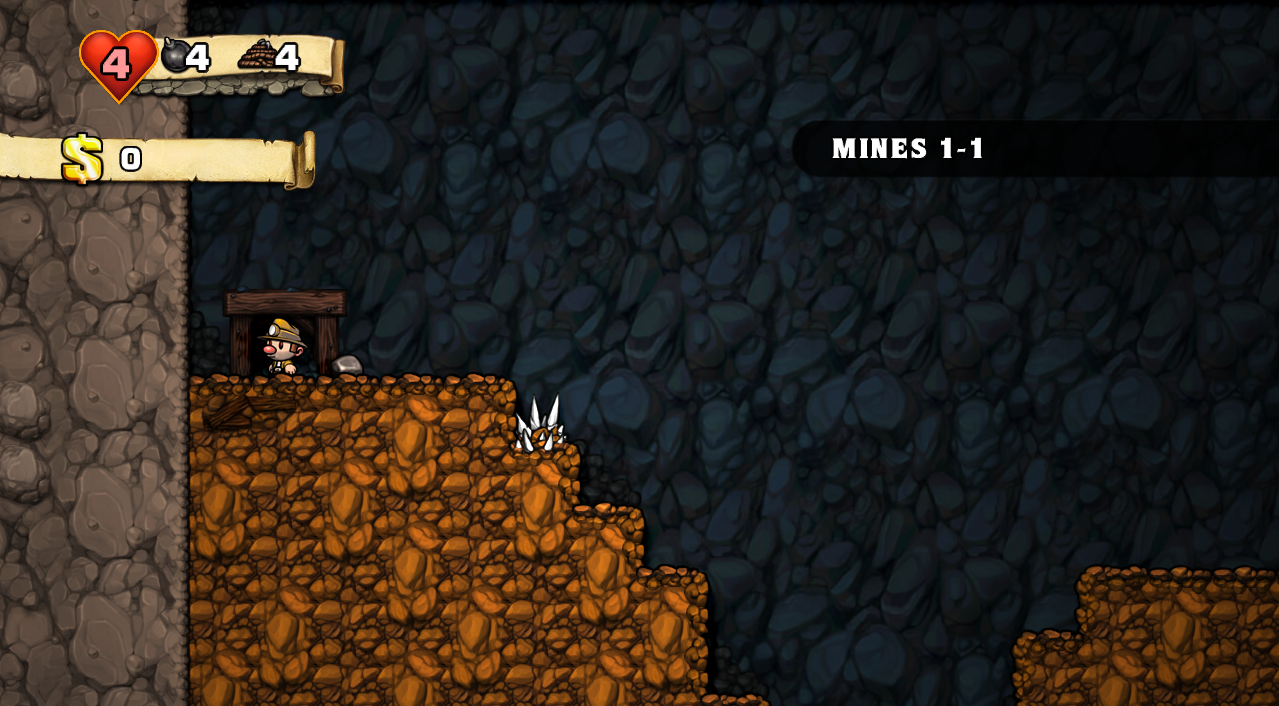
Everything appears to be as expected, but it's worth noting the generator placed a rock next to the entrance. This is default behaviour for entrances: the level generator will place a throwable object next to the entrance of each level. The object can be destroyed upon creation by surrounding the entrance on the sides with blocks.
